
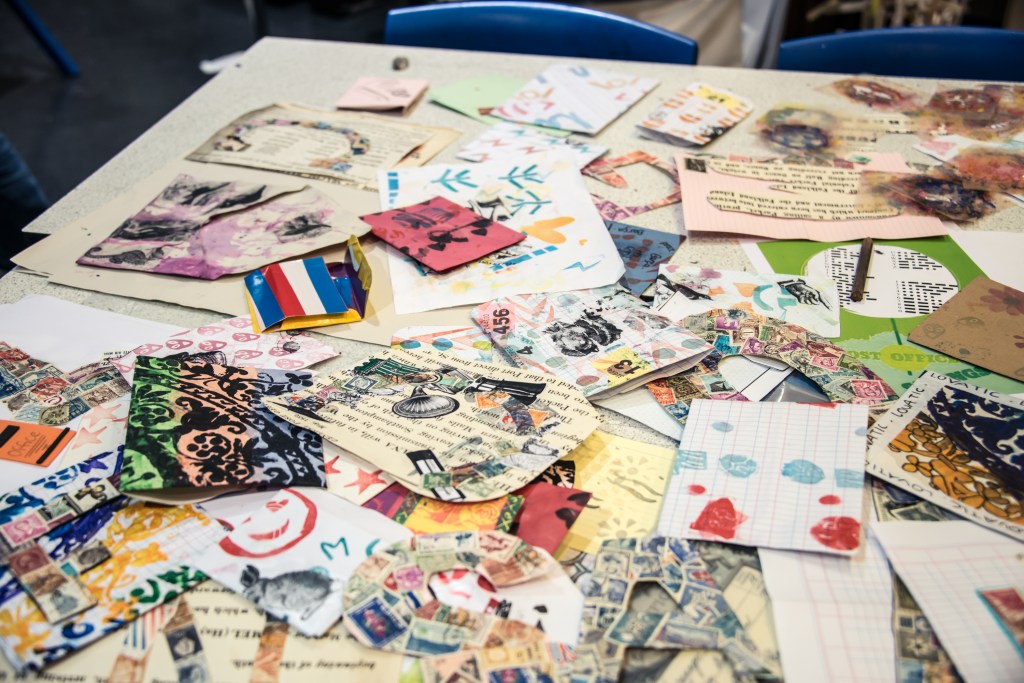
In 2015, as part of the Arts Council England funded project ‘Putting the Wunder back into the Wunderkammer,’ Islington Museum worked with Highbury Grove School, artist Carl Stevenson From All Change and the British Postal Museum and Archive (BPMA.) Students were inspired by the BPMA’s unique collection of mail art, historical letters and curious addresses, identifying
elements they’d like to incorporate into their own mail art. Students explored a range of different media and techniques, including print making, stamp making and using vinyl. Their final work was displayed at the BPMA archive in January 2015.
Ever since the invention of the postal service, people have sent weird and wonderful things through the post. The American artist Ray Johnson is considered to be the first person to send an artwork through the post. Today artists use a range of media and techniques to create mail art. Mail art can incorporate everything from collage to print works, even the position of the stamp on the envelope can convey a hidden message to the recipient.

")
")
Resource list
- Pencil
- Polytile
- Paint trays
- Printing ink
- Printing rollers
- Paper
The activity: making stamps
- Start with a piece of polytile. Using a pencil, draw your design into the polytile. Designs could be anything from letters, patterns, symbols, small images or emoticons. You will need to be careful to press hard enough into the polytile to make an indentation, but not too hard so that it pierces the polytile.
- Put some printing ink on to the paint trays, roll it with a printing roller until it is smooth.
- Use the printing roller to put ink on to your polytile, covering your design. Do not use too much ink.
- Place the inked side of the polytile on to a piece of paper. Run a clean printing roller over the back of the polytile, pressing it onto the paper.
- Carefully peel back the polytile to reveal your printed design on the paper.
")
")
")
Resource list
- Images from old posters and advertising
- Wide clear parcel tape
- Basin of warm water
- PVA glue
- Paper
The activity: image transfers
- Choose an image, it could be from an advert, magazine, book etc. Take a back and white photocopy of your image.
- Cut out the photocopy and stick clear parcel tape to the image. You may need to use multiple strips on wider images. Rub the tape to make sure it is in contact with the whole image.
- Put the taped image into warm water, covering it gently. Slowly rub away the paper. You will find that the paper will rub away in the water leaving behind the black photocopy image stuck to the tape.
- Paint PVA glue on the sticky side of the tape. Stick the image, glue side first on to your paper. Then wait for it to dry.
- Once it is fully dry if you are careful you can slowly peel the tape away to leave the photocopy image stuck to the paper.
")
")


Mail Art extensions
- Use the image transfers and rubber stamps to decorate envelopes. Post them to someone else (e.g. school, home, to another organisation) for them to add to your design. Continue posting the sheet back and forth. See how the design develops during the collaboration.
- Pass each pupil’s designs around the class during the project so that each envelope has a contribution from each pupil.
- Invent picture codes and make addresses for the envelopes in code. Post the letters and see if they reach the destination. Or pass it around the class and see if the class recipient can decode it.
- Vary the methods used to decorate the envelopes and even the envelopes themselves, maybe using 3D collage, origami or giant sized envelopes.


Leave a comment