
In 2016 artist Ella Phillips worked with teacher Emily Evans and Year 1 from Robert Blair Primary School on the exhibition Imagine Islington.
UV light therapy goggles
In the early 20th century rickets was a very common disorder among children, caused by a lack of vitamin D from food and sunlight. Their bones would become soft and weak, leading to bent legs and spines. UV light therapy was a new treatment used to help treat children at ground breaking local health centres, including the Finsbury Health Centre and Manor Gardens, Islington. Patients, as well as their watchful parents, would wear these goggles during the treatment to protect their eyes as direct UV light can be very dangerous.


")
Activity 1: Building Detectives
- images of buildings by Berthold Lubetkin: penguin pool, gorilla house, Spa Green Estate, High Point, Bevin Court, Finsbury Health Centre
- Split the class into teams named after colours. Place images of the different places around the classroom (each image is mounted on a coloured back responding to the team colours and numbered). The torches must find their images and mime the type of building to their team. The team must guess what place they are miming. Once they guess the next person can go to find building number 2, etc.
- Once a team has guessed all their buildings correctly they are the winner.
- As a class discuss the architecture of Berthold Lubetkin. We will be focusing on the Finsbury Health Centre. Think about the different ways in which it was unique in Islington and London at this time.
- n.b. Islington Museum has lots of information about Finsbury Heath Centre and Lubetkin.
Activity 2: Colour experiments
- different coloured acetate
- emotion words on cards (happy, sad, worried, calm, angry, confused, excited, tired, creative, adventurous, lonely, silly, scared, annoyed)
- torches
- coloured gel
- mirrors
- Discuss how different people see different colours. We used a picture for this and got pupils to discuss what colours they thought were in the picture.
- Split the group into pairs, each with a torch and some coloured gels. Get pupils to shine their torch through the different coloured gels and discuss how it made them feel. Ensure they experiment with different colour combinations.
- Then challenge the pairs to work out how to make white light (combining red, green and blue.)
- Hand the pairs a mirror. Can they reflect light using mirrors? Can they then make their light walk across the wall?
- Bring everyone back together. Discuss their experiments.
- As a group then move on to look at the relationship between colour and emotion. Discuss, how do you feel when it’s dark? How do you feel when the lights are on?
- Back in their pairs, try looking through the coloured plastic. How do different colours make you feel? Get pairs to experiment and then feed back as a class.
- Look at the coloured acetate in larger groups. Stick them to a window. Around the acetate stick any relevant emotion words next to the colours. Remember there are no right or wrong answers, it is all about discussion and justifying your answers.
- Encourage the groups to layer two coloured acetate on top of each other on the window. Would you change the corresponding emotion words?


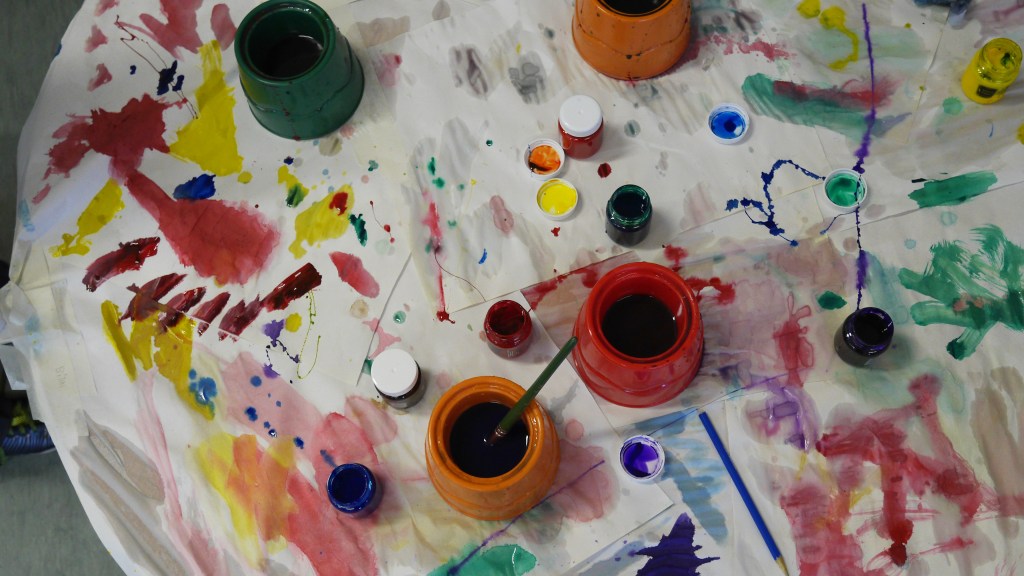
Activity 3: Colour and pigment
- Blueberries, turmeric, paprika, blackberries, charcoal, chalk, oil
- Paint brushes and pots
- 3.D glasses x 30
- Large sheets of watercolour paper
- Powder paint
- Set up tables, each with some blueberries, turmeric, paprika, blackberries, charcoal, chalk and oil.
- Pupils choose an ingredient and place it in a pot. Add a little oil and mix to create home-made pigments. Encourage each table to make a set of colours to use.
- Paint test patches or squares of pigment onto the watercolour paper on your table.
- Pupils then use their favourite colours to paint their 3D glasses.
- Pupils finally use the powder paint. They can experiment, predicting what colours they will create when they mix the powder paint with their pigments. Pupils should note down their predictions on their paper and then test their predictions, painting swatches of colour on to the paper. Can they create colour scales? Colour contrasts?


Activity 4: Sunlight photography
- sun-photo paper
- tissue paper
- plastic bags
- cling film
- plastic straws
- cardboard with marked frame area
- clear acrylic
- 6 x trays with cold water
- pegs
- washing line
- Remind pupils about the U.V treatment. Can you remember what the light was used for? Pupils are going to create their own sunlight x-rays in pairs.
- Spilt the class into 6 group, and each group into pairs. Each pair cuts different shapes out of tissue paper and plastic bags. Each pair also needs to collect different flat objects from the classroom or playground.
- Each pair needs to practise arranging the objects on the cardboard within the framed area, tying out different patterns and layouts.
- Each group in turn goes to the playground and arranges their objects in their chosen layout on the sun-photo paper. They then place the clear acrylic on top of their arrangement.
- Wait 5 minutes. Then remove the objects and submerge the sun-photo paper in a tray of cold water for 1 min.
- Hang the sun-photo paper up to dry on the washing line.


Activity 5: Interview a colour
- paper
- colour pens
- Lubetkin buildings b&w images
- scissors
- glue
- paint brushes
- coloured ink/ watered down paint
- Split the class into pairs. One person in the pair chooses a colour and imagines they are that colour.
- Pupils introduce themselves as their colour character to their partner. What do you like doing? Where are you normally found? Where do you never go? Who are your friends? How do you make them feel? What games do you like to play? What’s your favourite part of the day?
- Swap over and let the other person have a turn.
- Can your colour characters have a conversation?
- Pupils then draw a picture of their character and cut it out.
- Pupils then need to create a background for their character by cutting out and collaging the lubetkin b&w images on to a new sheet of paper. Once they are happy with their collage pupils can use paintbrushes to add some colour with the ink/ paint. Encourage pupils to only choose 1 or 2 colours maximum. Remind them they are not colouring in the images but adding a colour wash to them, as though they were looking at their picture through a colour filter.


Activity 6: Mono printing
- acrylic paint
- paint trays
- clear acetate
- paint brushes
- mark making tools: wheels, sticks, sponges
- stencils of foods
- cling film
- paper
- print rollers
- Thought cloud with pupils what we need for a healthy life (healthy food, sun, water, time outdoors etc.) Link to the issue in the early 20th Century where children were growing up with a vitamin D deficiency, which the health centres tried to remedy with the UV treatment.
- Collect the mark making tools, cling film and stencils. Discuss how each relates to something we need for a healthy lifestyle.
- Dip the mark making tools in paint and use to create marks on the clear acetate.
- Once pupils are happy with their design on the acetate they can place the sheet of paper on top of their acetate. Use a print roller to ensure the paper is pressed down, to create a clean print.
- Peel the paper off to reveal the print.
Activity 7: Painting with light
- light bulbs
- glass paint
- play dough
- clear & coloured acetate
- P.V.A glue
- brushes
- Pupils are reminded of the colour character they became.
- Pupils paint a lightbulb in that colour. Use the playdough to stick the bulb in to stop it moving around.
- We used our lightbulbs to create a light installation.
- Pupils that are finished can choose a large clear strip of acetate, and cut it in to a window shape.
- They can then cut smaller pieces of coloured acetate and lay them on to their window. Once they are happy with the design, pupils can use PVA glue to stick down their design.

Activity 8: Light boxes
- shoe box
- black paint
- sharp pencils
- straws
- glow sticks
- sellotape
- camera
- Pupils work either individually or in pairs to paint their shoe boxes black.
- Pupils then pierce their box, using the sharp pencils to create holes.
- They can then thread the straws and glow sticks through the boxes to create a light installation.
- Photograph the installations, experimenting with still shots and moving shots.
Want to know more:
Click here to find out more about the artworks created by Robert Blair Primary School and Ella Phillips as part of the Imagine Islington Project.


Leave a comment